Configuration
Access the POS settings
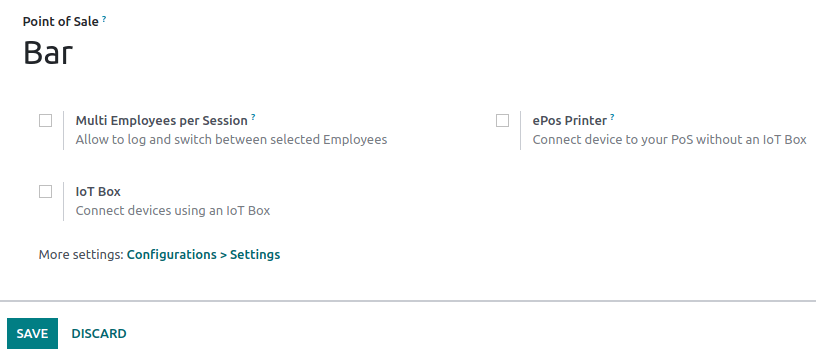
To access the general POS settings, go to . Then, open the dropdown menu in the Point of Sale field and select the POS to configure.

Note
These settings are available to users with the access rights Administration set as Settings.
You can also configure some settings from the dashboard by clicking the vertical ellipsis button (⋮) on a POS card. Doing so opens a popup window, from which you can:
Note
These settings are available to users with the access rights Point of Sale set as Administrator.
Make products available
To make products available for sale,
Go to .
Select a product to open the product form.
Tick the Point of Sale checkbox at the top of the form.

PoS product categories
Configuration
POS product categories allow users to categorize products and get a more structured and clean POS interface.
To manage PoS categories, go to . To add a new category, click Create. Then, name it in the Category Name field.
To associate a category with a parent category, fill in the Parent Category field. A parent category groups one or more child categories.
Example

Assign PoS product categories
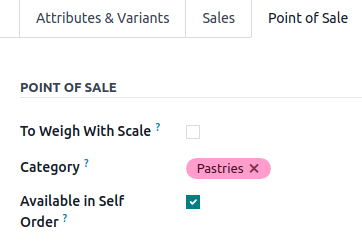
Go to and open a product form. Then, go to the Point of Sale tab and fill in the Category field under the Point of Sale section with one or multiple PoS categories.
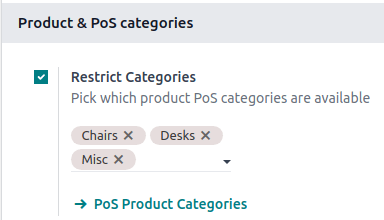
Restrict categories
You can limit the categories displayed on your POS interface. To achieve this, go to your POS settings and choose the specific categories to display in the Restrict Categories field within the Product & PoS categories section.